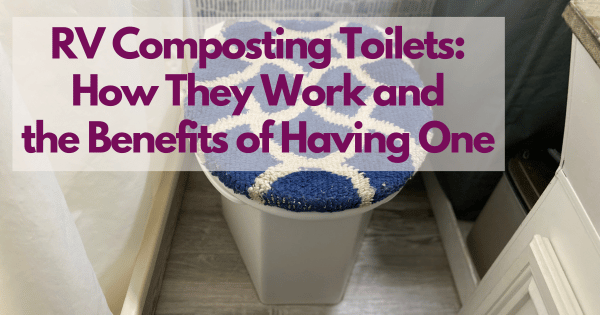
RV Composting Toilets: How They Work and the Benefits of Having One
written by Nancy Carter, Making My Own Lane
Composting Toilets: How They Work and the Benefits of Having One in Your RV
What is a Composting Toilet?
The theory behind a composting toilet is that the solids are separated from the liquids.
When the solids and liquids do not mix, there is no odor.
Unbelievable? Yes. Almost magical to me, because it’s true!
How does a Composting Toilet work?
Instead of flushing waste away into a tank, the black tank, waste is composted into an eco-friendly waste.
A composting toilet consists basically of:
A big bucket, or collection container for solids located in the back of a toilet housing system, which looks like a toilet, toilet seat and all.
A smaller container, or gallon jug, for liquids located in the front of the toilet housing system.
A diverter, which “diverts” the liquids into the gallon jug and keeps it out of the solid collection container.
A sealing lid, which sits on the toilet hole and is removed when you need to use the toilet and put back on when you are done.
A churn handle. When you use the solids bucket, you put your toilet paper in the big bucket, shut the sealing lid, place the churn handle in the small hole in the top of the toilet seat, and turn the crank 10 to 15 times to mix it up and start the composting process.
The solid waste is collected in the big bucket, which is filled with a composting medium such as Coco Coir, made from fiber from the outer husk of a coconut. Coco Coir is used in gardens for water retention, as it can absorb up to 10x its weight in water. Other mediums you can use are sawdust, peat moss, wood shavings, pine pellets, or small animal bedding like pine shavings or corn cob hulls.
I prefer the Coco Coir because I haven’t had any problems with it, it’s reasonably priced, it doesn’t attract any bugs, and it comes in small bricks which are easy to store in an RV. I’ll talk more about that later.
There are many types of composting toilets available. Mine is a C-Head.
Why would I want a Composting Toilet instead of a traditional toilet?
It was already installed in the RV when I bought it, and it was one of the items on my wish list.
However, I had done a lot of research before I bought my RV, and this is why I wanted a compost toilet.
I didn’t want to mess with cleaning out a black tank filled with poop. Remember the movie RV?
I wanted to be able to camp off grid, without any electric or water. With a composting toilet, you are not using water to flush a toilet, which also means you are not filling up your gray water waste tanks as quickly as you would with a traditional toilet.
I wanted a no odor option. When you have a black waste tank, they can smell pretty bad, even if you treat them. There is little to no smell with my composting toilet. Just turn on the exhaust fan when you are using the toilet.
How do you clean a composting toilet?
Emptying the liquids
I have to empty, or change out the liquids container almost every day. I have 3 jars that I use, and I replace the jars every month with new ones from Dollar Tree.
I have found that no matter how much you rinse them out, they will still retain odors. So I replace them monthly.
Emptying the solids
I have found that scheduling to clean the bucket on the first of every month works for me, as a solo user of the toilet. I do it whether I feel it needs to be done or not, and after almost a year, this system works for me.
As the bucket fills up more, you will find the churn handle gets harder to turn. At first it practically spins around by itself, and by the end of the month, you have to put in a bit more effort.
I put on disposable gloves.
I line the bottom of the shower with 2 large garbage bags.
I open up the toilet seat, remove the liquids container, and take out the bucket.
I open up the top garbage bag and flip the bucket over to empty the contents into the bag. Here’s where it gets weird - there’s no odor!
I tap around the outside of the bucket to make sure that all the contents of the bucket are removed.
I take a paper towel and go around the inside of the bucket. I don’t wipe it out with any kind of cleaner, as any residue helps the clean bucket with the composting process.
I do spray the inside of the toilet house unit with disinfectant and wipe it down before placing the bucket and liquids container back in it.
I fill the solids bucket about ⅓ full of the Coco Coir mix
I shut the lid and wipe that down with disinfectant as well.
I clean the sealing lid and place it back on the toilet seat.
That’s it. I take the first garbage bag and place it in the second garbage bag and bring it to the trash dumpster. I am surprised by how little it weighs.
Even though it is considered eco-friendly, I still dispose of the garbage into a dumpster.
The entire process takes less than half an hour. Once a month. No smells and no black tank.
You can click on the photo above if you want to see a short video on how to clean a composting toilet.
Six tips for using a composting toilet
Now for the gross part. Using a composting toilet requires a small learning process. I have found some of these tips out the hard way, and I feel I know you all well enough by now to share my faux pas.
You have to sit towards the front of the seat to pee, and the back of the seat to poop, so that everything ends up in the container it’s supposed to. Remember, the goal is for the solids and the liquids to stay separated.
If you’re a guy, the best way to pee is to sit down. Really. I’m not a guy, so I don’t know how difficult this would be if you are.
You have to remember to take the sealing lid off before you use the toilet, even in the middle of the night when you’re only half awake.
You always have to remember where you are and what kind of toilet you are using, or you may have to wipe out the diverter with a lysol wipe and put it in the garbage. No wipes allowed in the solids container, but you can use them to clean the other toilet components. Or you may end up with liquids in your solids, and that will create an odor.
I use Scott’s toilet paper, which is safe for septic systems and breaks down very quickly. You can put the toilet paper right in the solids bucket.
I spray the diverter with 50% Lysol spray, 50% water after each use. Some people recommend using a vinegar/water combination, but I prefer the Lysol.
At some point during the month, you may feel you need to add more Coco Coir to the bucket to help with composting and absorbancy. I start the bucket about 1 ⁄ 3 full of Coco Coir, and I keep a container of fresh Coco Coir with a scoop next to the toilet. I usually add a couple of scoops every 10 days or so.
Which leads me to
How to prepare the Coco Coir for use in a composting toilet
I get my Coco Coir on Amazon. I have tried 1.4 pound bricks, pucks, and after 10 months, I have found that the 250 gram bricks are the easiest to prepare.
Coco Coir comes compressed, so you have to break it up with a small amount of water until it turns into something resembling sawdust. It has an earthy, but not unpleasant, odor. You don’t want to add too much water, because you want to keep the absorption
With the slimmer, 250 gram bricks, I can place 1 brick into a gallon storage bag, add about a cup of water, seal the bag, and the brick absorbs the water and I can start to break it up almost immediately.
With the larger bricks, I had to put them in a bucket, add about 3 cups of water, and I still found them very difficult to break down.
With the pucks, I found it difficult to get the material the consistency that I wanted.
If you have any comments or questions about having a composting toilet in your RV, click here.
Thanks for joining me as I explore more in this full-time RV life.
Subscribe below for updates as we travel and continue to learn more about life on the road. I post new blogs every Friday.
Thank you for subscribing!
Have a great day!